Customize Styling
Customize the Booking Engine
Use the Theming API to customize the booking widget look and feel.
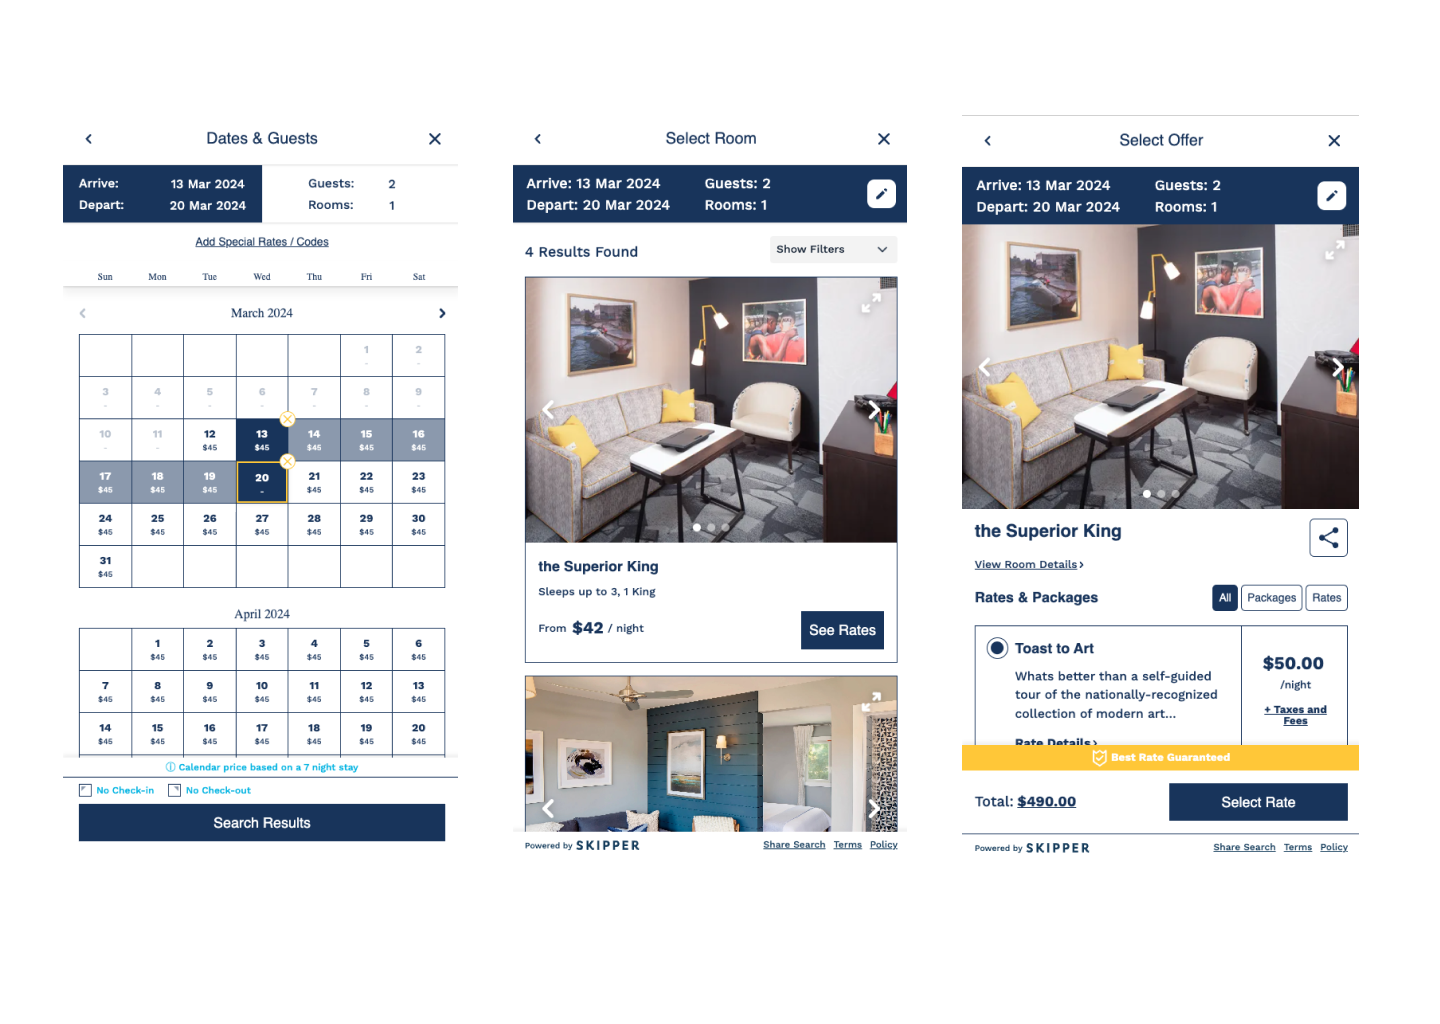
Here is a quick overview of some of the styles you can apply using Skipper:
Light Theme
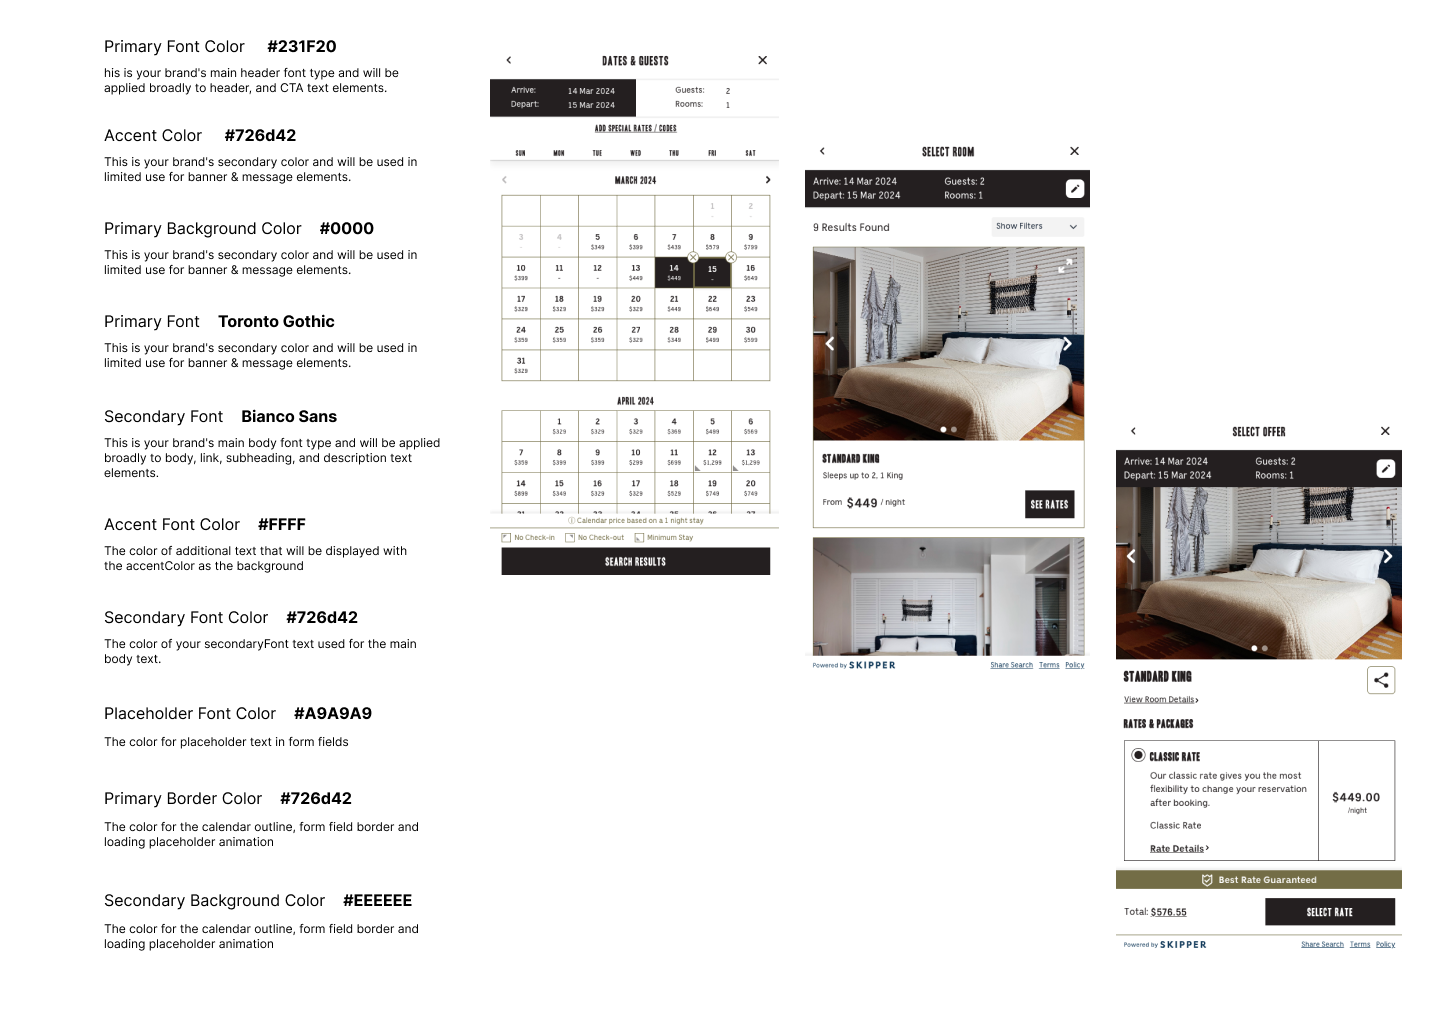
Dark Theme
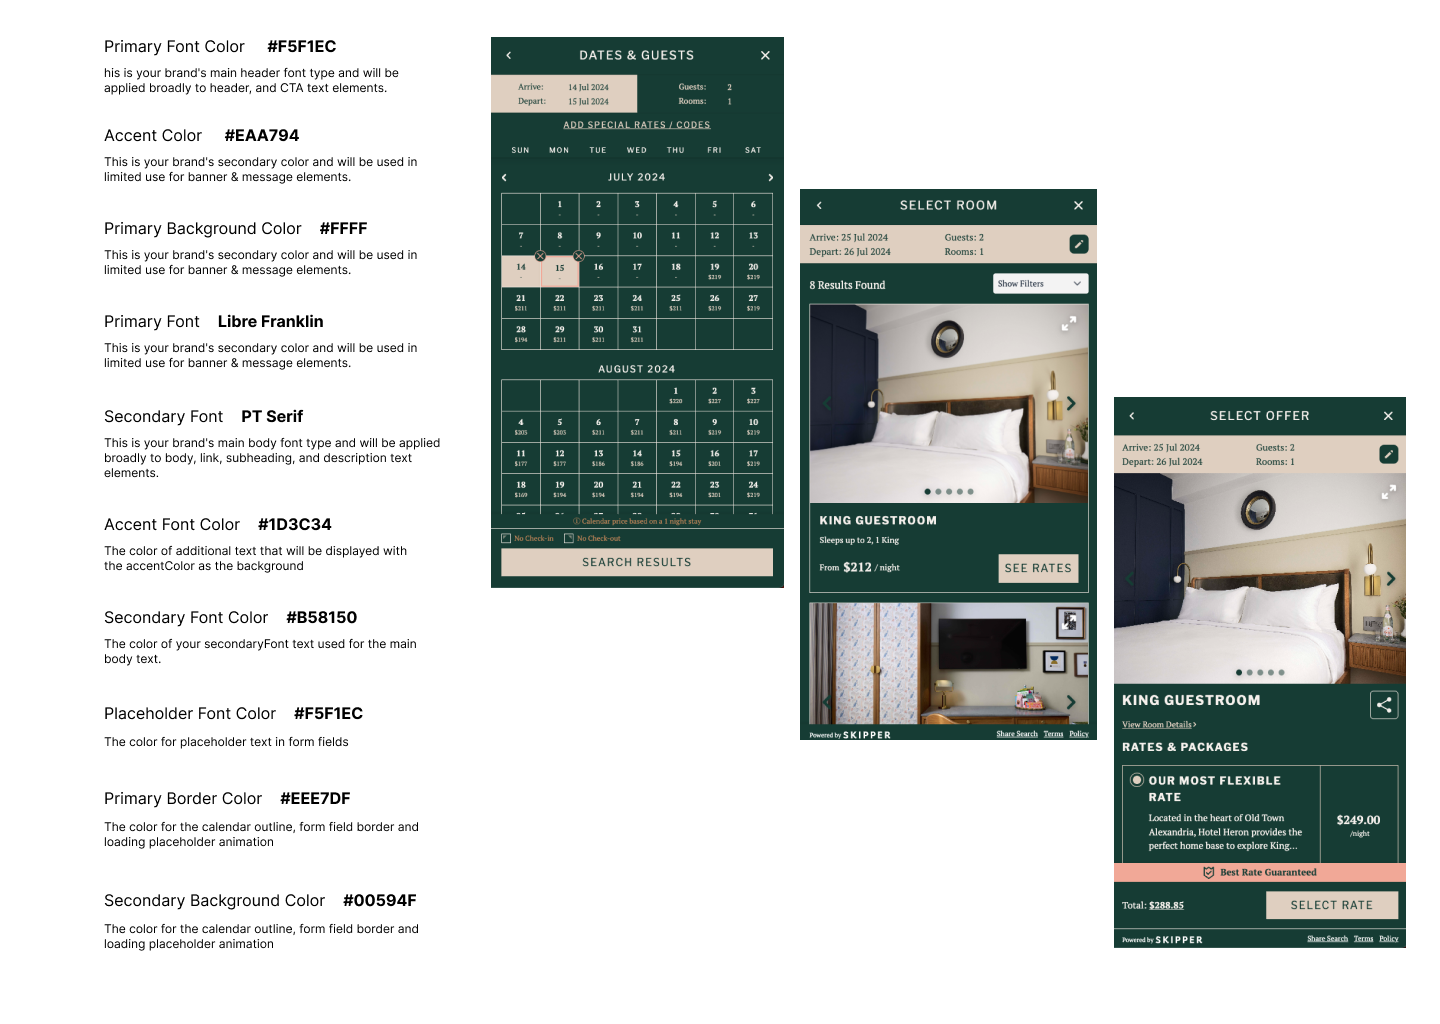
Style Example
In this section, we will cover styling for a live Skipper website. We will be going through the essential styling properties required to effectively match the booking engine styles with the Skipper website design.
Note: Before going through this section, please go through Theming API first
Here's the website link:
https://skipperhospitality.com/
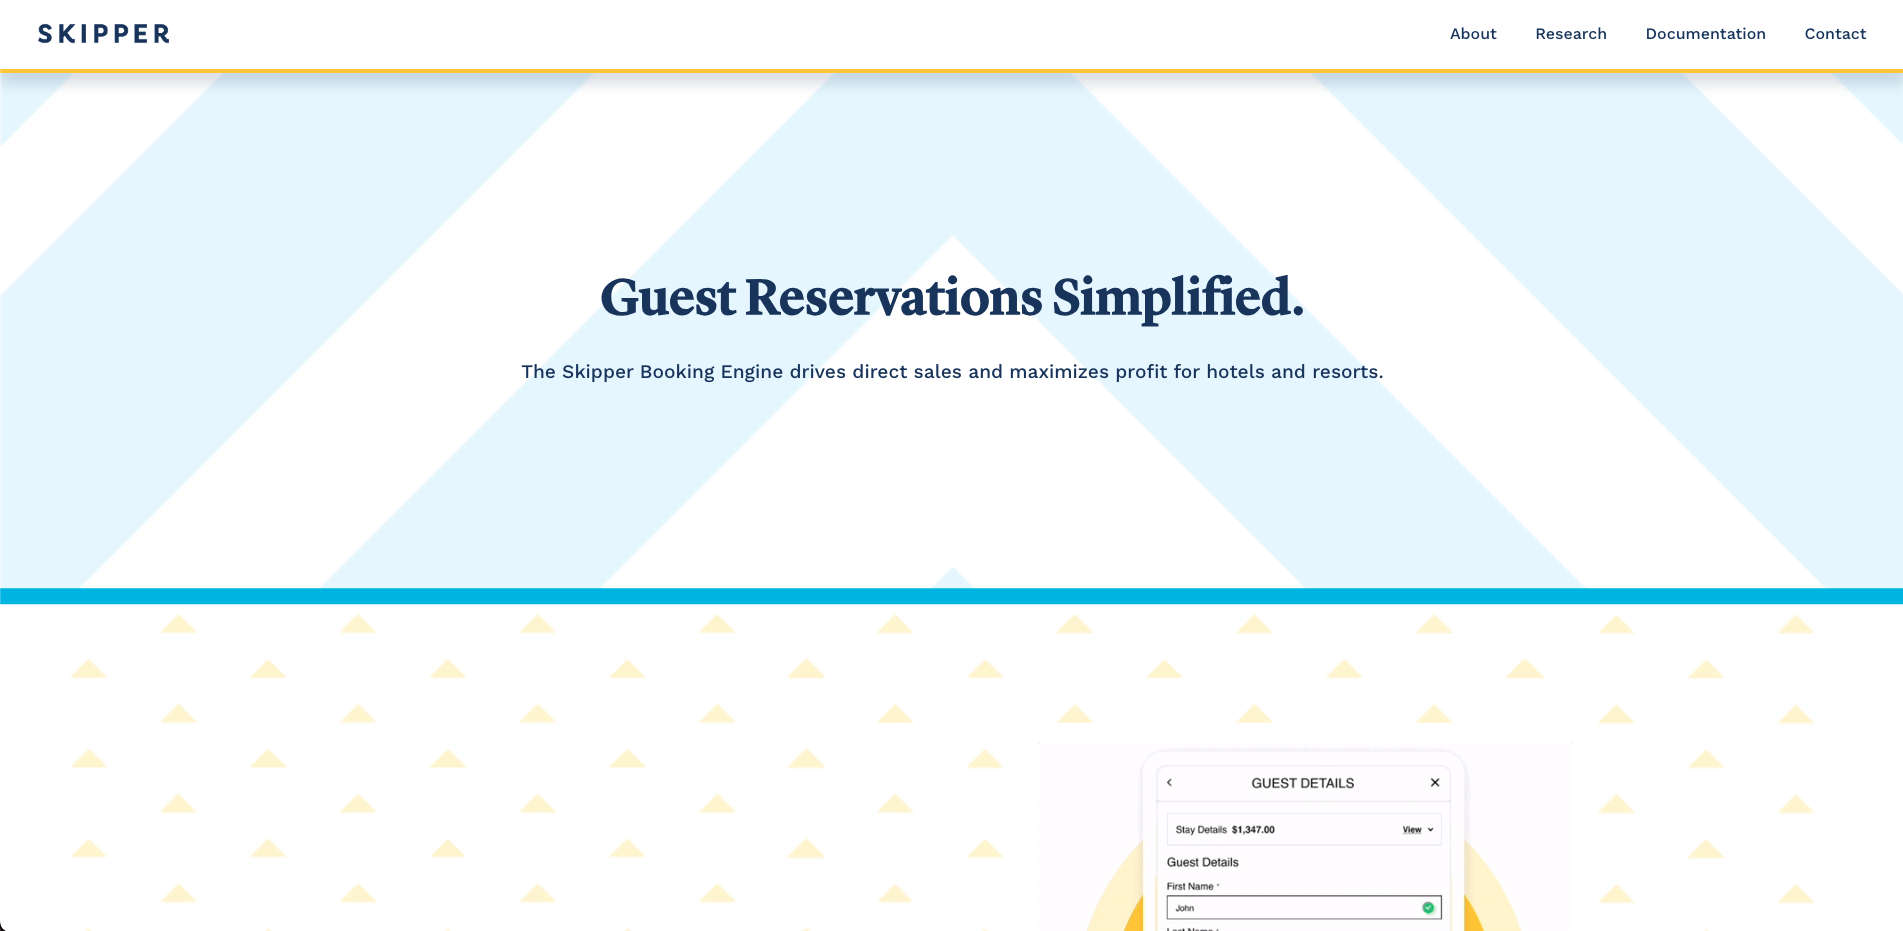
Based on the screenshot above we can tell that the primary background color is white. So let's go ahead and set the primary color to white within our code.
    style: {
        primaryBackgroundColor: "#FFFFFF",
    }
A specific shade of yellow complements the website as an accent color. Let's go ahead and set the booking engine's accent color to this shade of yellow.
    style: {
        primaryBackgroundColor: "#FFFFFF",
        accentColor: "#F8C605"
    }
We can also see multiple shades of blue on the website. Let's use those as well. We will use the darkest shade of blue as the primary color & primary font color.
And, we'll use the light blue as secondary font color.
    style: {
        primaryBackgroundColor: "#FFFFFF",
        accentColor: "#F8C605",
        primaryColor: "#1E345D",
        primaryFontColor: "#1E345D",
        secondaryFontColor: "#43B4E5"
    }
This is how it's looking so far:
Now let's work on those border colors. We will use the same color as the primary font color
    style: {
        primaryBackgroundColor: "#FFFFFF",
        accentColor: "#F8C605",
        primaryColor: "#1E345D",
        primaryFontColor: "#1E345D",
        secondaryFontColor: "#43B4E5",
        primaryBorderColor: "#1E345D",
    }
Time to add the font families and style them. Upon inspection, we can see that Skipper is using Work Sans and Lyon font types. While we are at it, let's also change the accent font color to white.
    style: {
        primaryFont: {
            family: "Lyon",
            transform: "titlecase",
        },
        secondaryFont: "Work Sans",
        primaryBackgroundColor: "#FFFFFF",
        accentColor: "#F8C605",
        primaryColor: "#1E345D",
        primaryFontColor: "#1E345D",
        secondaryFontColor: "#43B4E5",
        primaryBorderColor: "#1E345D",
        accentFontColor: "#FFFFFF"
    }
Last but not the least, we add these properties:
    style: {
        primaryFont: {
            family: "Lyon",
            transform: "titlecase",
        },
        secondaryFont: "Work Sans",
        primaryBackgroundColor: "#FFFFFF",
        accentColor: "#F8C605",
        primaryColor: "#1E345D",
        primaryFontColor: "#1E345D",
        secondaryFontColor: "#43B4E5",
        primaryBorderColor: "#1E345D",
        accentFontColor: "#FFFFFF",
        alertBackgroundColor: "#7e7e7e",
        successColor: "#22c55e",
        errorColor: "#b91c1c",
        errorBackgroundColor: "#ef5151",
        warningColor: "#facc15",
        inactiveOpacity: 0.5,
        disabledOpacity: 0.3,
        highlightOpacity: 0.1,
        stateOpacity: 0.4
    }
To learn more about the properties above please visit Theming API, or you can use the property values above
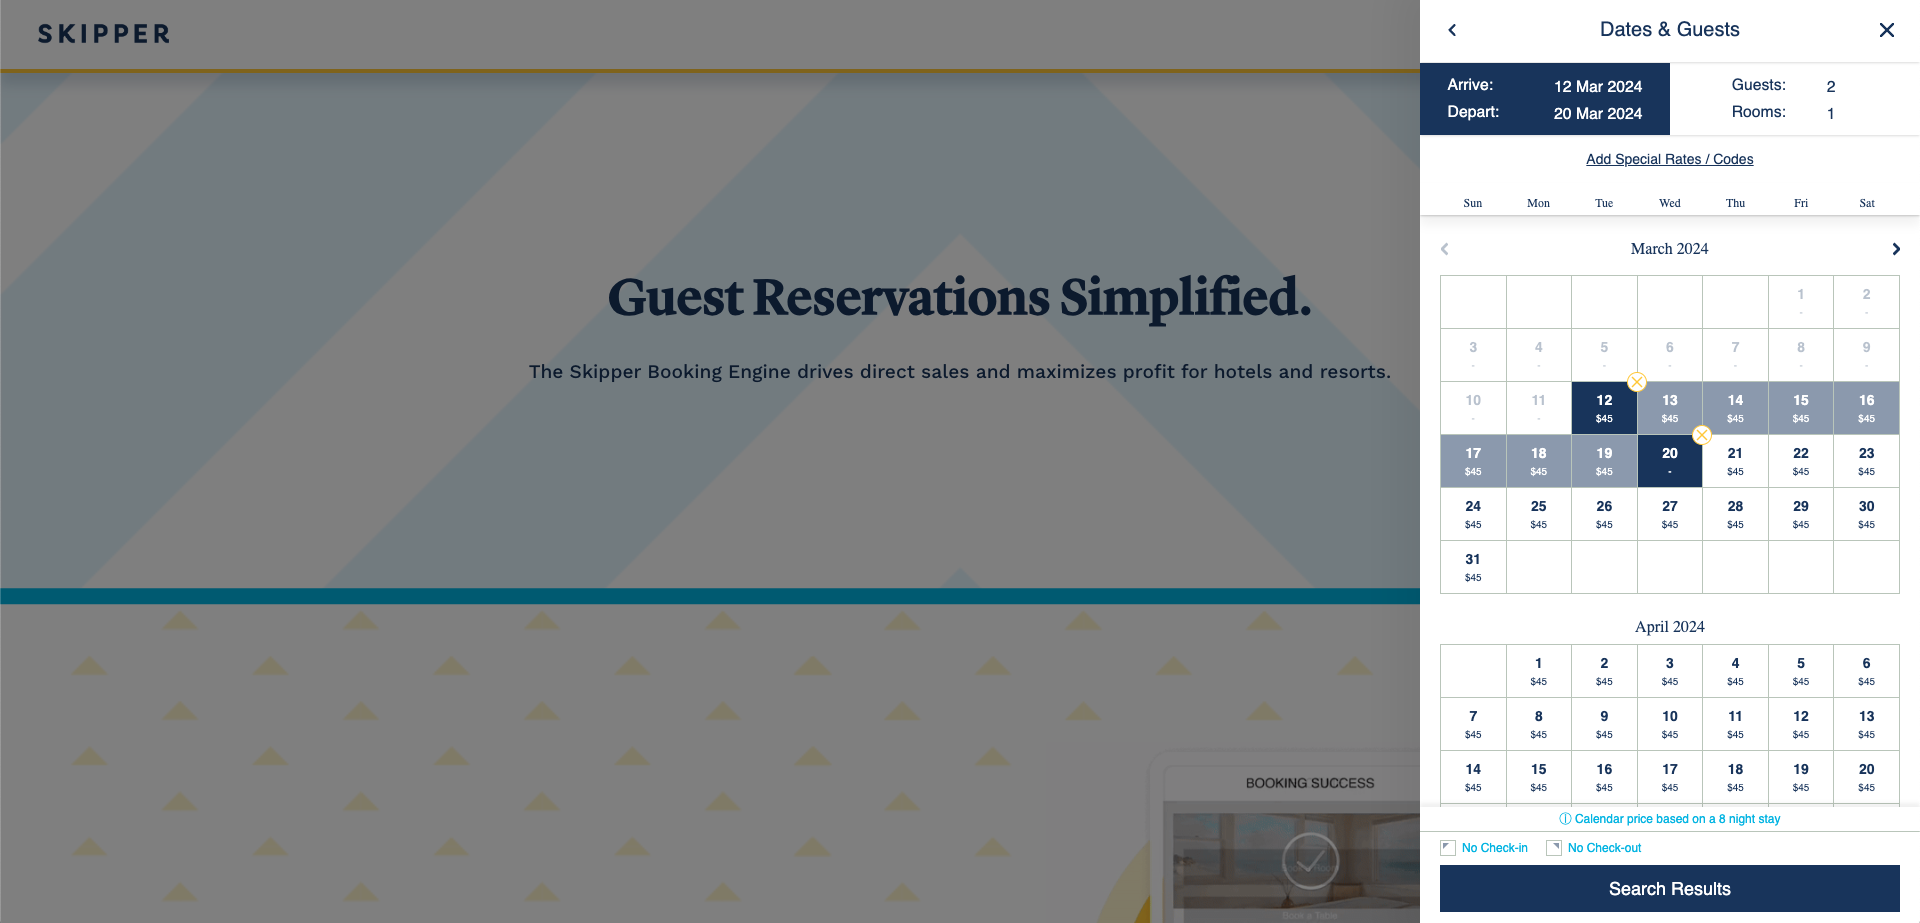
Finally, this is how it's looking now: